Use this option to add materials to a manufactured estimate. When you post materials to an estimate, you have the option of having MES also accumulate the amount of labour (Qty Req x Lab. Cont entered on this screen) required to install those materials onto a job.
To add materials to a manufactured estimate:
Refer to "Maintaining the Manufactured Estimate Header".
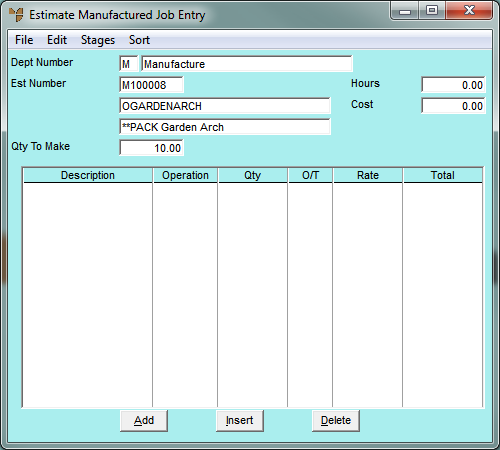
Micronet displays the Estimate Manufactured Job Entry screen.
|
|

|
Technical Tip By default, the Estimate Manufactured Job Entry screen is set to add or edit materials for an estimate. You can also add or edit text or labour, depending on the option selected under the EDIT menu on this screen – ITEM, TEXT or LABOUR. For more information about the other two options, see "Adding Text to a Manufactured Estimate" and "Adding Labour to a Manufactured Estimate". |
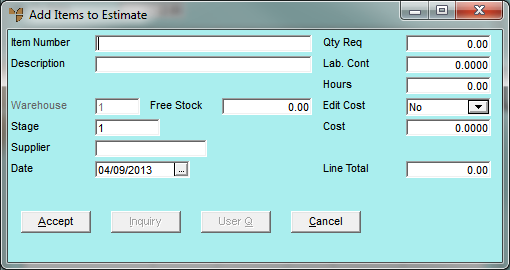
If you selected to add, insert or edit an item, Micronet displays the Add Items to Estimate screen.
|
|
|
Technical Tip You can add or view narrative text for an item by pressing F5 – see "Adding or Viewing Narrative Text". |
|
|
Field |
Value |
|
|
Item Number |
Enter the item number for an item that is a component of the manufactured job. You can also press Tab or Enter to select an item. |
|
|
Description |
Micronet displays the description of the selected item. You can change this description if required. Normally, this would only be changed for the posting of non-inventory items. |
|
|
Warehouse |
Micronet displays your default warehouse as set in your user security. Enter the warehouse where the goods are located. |
|
|
Free Stock |
Micronet displays the quantity of stock on hand in the selected warehouse. |
|
|
Stage |
Micronet displays the default stage for this estimate as set in the Department master file (see "Adding a New Department"). Normally this would be set to 1. You can delete this and enter another stage if required to post this transaction to. You can also press Tab or Enter to select a stage. |
|
|

|
Reference If your estimate has multiple stages and you haven't created them yet, see "Estimate Manufactured Job Entry - Stages". |
|
Supplier |
Micronet displays the preferred supplier for the item. You can enter a different supplier number, or press spacebar then Enter to select a supplier. |
|
|
Date |
Micronet displays today's date. You can change this if required. |
|
|
Qty Req |
Enter the total quantity of the item needed for this estimate, i.e. the quantity of this part that you need to complete the manufactured item. |
|
|
Lab. Cont |
Enter the amount of labour required to install the item as a decimal of hours. For example, 15 minutes is entered as 0.25 or 30 minutes is entered as 0.50. To help you convert minutes to decimals, a table is provided under "Converting Times to Decimals" You can accept the default labour content that has been setup for this item in Inventory master file (refer to "File - Inventory - Extra"), or you can edit the value for this estimate. |
|
|
Hours |
Micronet displays the actual hours for this estimate. |
|
|
Edit Cost |
Select Yes if you want to be able to change the Cost (unit cost) calculated by Micronet and have this new price saved in MES. Select No if you don't want to change the Cost calculated by Micronet. |
|
|
Cost |
Micronet displays the unit cost for non-inventory items so you can enter the correct cost for the item being posted. If you selected Yes in the Edit Cost field, you can change the cost displayed. Note that you cannot enter a unit cost for normal stock lines. |
|
|
Line Total |
Micronet displays the total cost for this item, i.e. the quantity required x the cost. |
If you added an item to the estimate, Micronet redisplays the Add Items to Estimate screen so you can add further items if required.
|
|
|
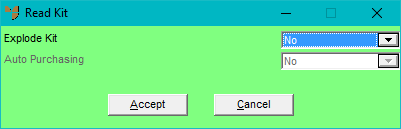
Technical Tip If you added a kit item in a Manufactured category to the job/estimate (not a sub-assembled kit item), when you select Accept Micronet displays the Read Kit screen.
In the Explode Kit field, select Yes if you want Micronet to break the Bill of Materials (BOM) up into its component items, or select No to leave the master kit item intact on the job. If you explode the kit, each component item can then be edited as required. If you select to explode kit items and the Default Used Qty to Zero on Jobs field on the MJC General Configuration screen is set to Yes, the Auto Purchasing field on this screen will default to Yes - All Stock – see "Edit - Applications - MJC - General". |
|
|

|
Warning Once a kit has been exploded, it cannot then be reassembled at a later time. |
Micronet redisplays the Estimate Manufactured Job Entry screen, showing the items, text and labour posted to the estimate.